Mark the anatomy in motion, then pierce perpendicular to the tissue plane
Key Takeaways:
» The working target for most standard piercings is perpendicular entry through the tissue plane, not a fashionable angle copied from a photograph.
» Mark the client sitting or standing naturally, then repeat the assessment through the area’s full range of movement.
» Re-check the marks after clamping because the clamp can pull soft tissue out of alignment.
» A piercing angle and the jewellery’s final orientation are related but not identical decisions.
» If the tissue cannot support a stable, low-pressure channel, changing the angle will not rescue the placement; choose another site or decline the piercing.
1. The angle starts with anatomy
A piercing needle should normally pass perpendicular to the tissue plane at the entry and exit points. That distributes pressure across both sides of the channel instead of making one wall carry most of the load. A slanted channel may look acceptable when the client is standing still, then put constant leverage on one side once the jewellery is installed.
That is the part diagrams routinely simplify. The client is not a flat illustration, and cartilage, folds, curves, and moving soft tissue do not politely remain in the position they occupied during the consultation. The practical method described in this piercing angle guide for entry and exit points is to mark the placement in a natural posture, test movement, and reassess after clamping.
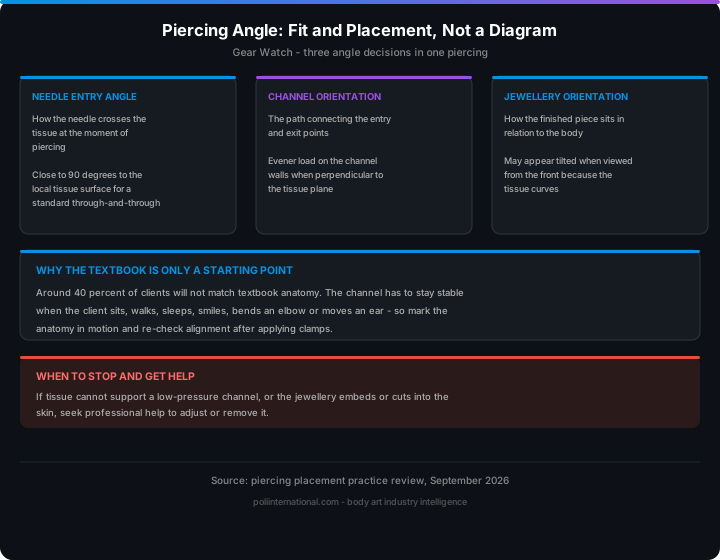
The aim is not to force every piercing into a mathematically identical orientation. The aim is a channel that remains stable when the client sits, walks, sleeps, smiles, bends an elbow, or moves an ear. Around 40 percent of clients will not match textbook anatomy, so the textbook is a starting reference rather than a verdict on whether the body has passed an examination.
2. What the main angle decisions actually mean
“Correct angle” is often used to describe three separate decisions:
- Needle entry angle: how the needle crosses the tissue at the moment of piercing.
- Channel orientation: the path connecting the entry and exit points.
- Jewellery orientation: how the finished piece sits in relation to the body and the client’s movement.
For a standard through-and-through piercing, the needle entry should generally be close to 90 degrees to the local tissue surface. The jewellery may still appear tilted when viewed from the front because the tissue itself curves or because the desired decorative alignment follows the ear, nose, lip, or navel.
| Feature | Perpendicular tissue-plane approach | Angled tissue-plane approach |
|---|---|---|
| Load on channel walls | More evenly distributed | Concentrated on one side |
| Jewellery pressure | Easier to balance | Greater risk of leverage |
| Visual result | Stable relative to the tissue | May look attractive initially but shift |
| Movement tolerance | Better when marks are tested dynamically | More vulnerable to swelling and friction |
| Typical use | Standard lobe, nostril, cartilage, and many soft-tissue placements | Only when anatomy and design specifically require it |
| Main risk | Poor marking or clamp distortion | Uneven loading, irritation, migration, or rejection |
The table does not mean every piercing must look like a tiny surveyor’s benchmark. A nostril, conch, helix, and navel each have different surfaces and jewellery requirements. It means the piercer must define the relevant tissue plane first, then judge the angle against that plane—not against the room, a camera, or a stock photograph.
Jewellery sizing matters just as much. A correct channel can still become irritated if the bar is too short, too long, or poorly matched to the tissue’s movement. That is why anatomical geometry and body-jewellery fit belong in the same assessment as the needle path rather than being treated as an afterthought.
3. The technical detail: tissue planes, movement, and pressure
The most useful geometric rule is simple: the needle should cross the tissue thickness at right angles wherever the anatomy allows. In a uniform fold, that gives the shortest practical route through the tissue and reduces the tendency for the jewellery to lever against one wall.
Real anatomy is less cooperative. The piercer must account for:
- Tissue thickness: thin tissue may not provide enough depth for a stable channel; thick or curved tissue may require different jewellery dimensions.
- Surface curvature: the visible skin surface may not represent the direction of the underlying tissue plane.
- Range of motion: ears, lips, eyebrows, navels, nipples, and surface placements change shape as the client moves.
- Jewellery axis: threaded ends, curved barbells, rings, and flat-back labrets each impose different forces.
- Swelling allowance: initial jewellery needs room for expected swelling without becoming a lever or pressure point.
- Downsizing: once swelling reduces, excess length can catch, rotate, and repeatedly disturb the channel.
A useful check is to mark both points while the client is relaxed, then ask for the movements most likely to affect the placement. For an ear, that may include turning the head and checking how the ear meets glasses, helmets, headphones, or sleeping surfaces. For a navel, bending and sitting reveal more than standing. For an eyebrow, facial expression changes the tissue tension.
The marks should be inspected again after clamping. A clamp is not a neutral picture frame; it can compress, rotate, or pull the tissue. If the marks no longer describe the intended path, the piercing has not “nearly” been positioned correctly. It has changed and needs to be reassessed.
The same principle applies to industrial piercings, where two channels must work together. The individual piercings need appropriate tissue-plane entry, but the final jewellery also requires matching alignment. If the two channels are independently correct yet point in conflicting directions, the bar creates pressure between them. The result is irritation that clients often blame on the metal, the aftercare, or bad luck. Sometimes the geometry simply lost the argument.
4. Patrick's Note: The body is not a diagram
When a client asks whether a piercing is “supposed to be perfectly straight,” the useful answer is this: it should be stable, comfortable, and suited to your anatomy—not merely straight in one photograph. The marks need checking while you are sitting or standing naturally and moving the area before the needle ever comes out.
A good piercer will explain what the tissue is doing, show you the planned entry and exit points, and change the plan if movement or jewellery pressure exposes a problem. The piercer training guidance on angle, depth, and re-checking after clamping is deliberately less glamorous than a diagram, because bodies are inconveniently three-dimensional. If the placement only works while you hold yourself like a museum mannequin, it does not work.
5. FAQ: Technical Q&A
Q: Is every piercing supposed to be pierced at exactly 90 degrees?
No. The needle should generally enter perpendicular to the relevant tissue plane, but the body surface may curve and the jewellery may need a particular final orientation. The correct reference is the tissue at the planned channel, not the floor, camera, or front-facing photograph.
Q: Why can a piercing look straight at first and then start to tilt?
Swelling, pressure, sleeping on the piercing, oversized jewellery, and an uneven channel can all change how the jewellery loads the tissue. Movement testing and correct initial sizing reduce those forces, but they cannot compensate for a placement that was unstable from the beginning.
Q: Does a clamp guarantee the angle is correct?
No. A clamp can distort the tissue or move the marks, so the placement must be checked again after clamping. If the entry and exit points no longer line up with the intended tissue plane, the piercer should release the setup and reassess rather than proceed out of momentum.
Conclusion: Measure movement before making the hole
A sound piercing angle is not a decorative number. It is the relationship between the needle, the tissue plane, the jewellery, and the client’s normal movement. Mark dynamically, check after clamping, and judge stability before appearance.
Verdict: use the perpendicular-tissue-plane principle as the working baseline, but do not force anatomy to match a diagram. This approach is for every professional piercing studio, especially practitioners handling cartilage, industrials, surface placements, and clients whose anatomy does not fit stock examples. For the next stage, use the body-piercing angle and placement assessment method at the bench rather than relying on a remembered photograph.